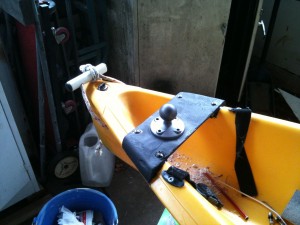
Over the past few days a little progress was made on the Ultralight installation. The bracket was trimmed and the spiky fibregleass edges covered with epoxy filler to make it comfortable to handle. The next day it was sanded and painted. Today it was attached with screws and flexible adhesive. The first photo shows this stage – and the ball joint is positioned on the bracket where it is about to be bolted on. This ball joint is the main support for the ultralight arm – the arm also has a rubber pad which will just sit on the deck and provide an additional leverage point to give it extra support.
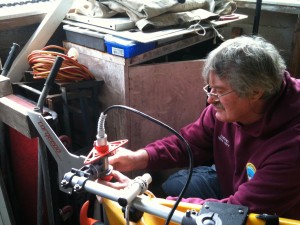
The ball joint comes with two suggested attachment methods, bolts and nuts for where there is access to the back of the attachment surface, and for blind holes, bolts with expanding connectors which spread out behind the kayak shell to provide an anchor. I used the regular bolts through the plywood/fibreglass bracket. With the bracket in place, we could now fit the support arm and the motor. Malcolm has been helping me with this project and the work is being done in his carport, as you can see in the next photo.
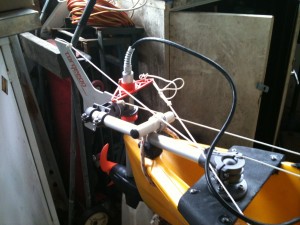
With the motor in place we could now run some cords to control the motor steering and its raising and lowering. The motor can be simply installed without steering – and you use the paddles to steer as you normally would. We like the idea of being able to sit back and not have to paddle and so we need to control the direction with minimum effort. The orange bracket concealing Malcolm’s right hand in the photo above is used for steering and we’ll attach a cord to this. We’ll be setting it up as and endless cord with its middle running across the kayak beneath the knee position when seated – there’ll be just a knot in the middle to be indicator of straight-ahead. To steer the idea is to grab the cord and move it to the right or left. To make the steering naturally intuitive its helpful to have a cross-over of the cords so that moving the knot to the left will take the kayak to port, and moving the knot to the right will take the kayak to starboard.
Also in the photo above is another chord running from the top of the tail fin which is used to raise the motor. Not fitted yet is to be another line which will be needed to keep the motor down when reversing. When normally under way this line would be slack to allow the motor to kick up if it hits something.
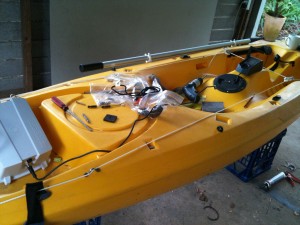
Next question is where to locate the throttle control and the battery. The photo shows the battery sitting in the storage bay behind the pilot. The preferred throttle position is on the central hump – this seems preferable to edge mounting where it may be bumped when paddling. It makes the LCD display easy to see as well in the straight ahead position. As you can see, the cable is just long enough, but it may not be when the pilot is sitting on it! The round behind the pilot position is for positioning a round hatch. It could be good to have the battery in the hatch where it is better protected, and if we run the cable inside the kayak its solves the problem of length, as well as keeping the cable out of the way.
So thats the next part of this project but I’ll be busy with other things for a while. See you in a few days…
